
How To Build A Photo Light Box For Less Than $10
How To Build A Photo Light Box For Less Than $10: A Game-Changer for Aspiring Photographers
As an aspiring photographer looking to elevate your product photography game, you’re in luck! Building a photo light box for under $10 is not only budget-friendly but also incredibly easy. In this comprehensive guide, we’ll walk you through the simple steps to create a professional-grade lighting setup that will make your products shine.
Materials Needed:
To get started, gather these basic materials:
Cardboard box
White tissue paper or thin fabric
Scissors or craft knife
Clear tape
Poster board (white or any other desired color)
2 desk lamps or LED lights
Step by Step Instructions:
Follow these easy steps to build your photo light box: 1.
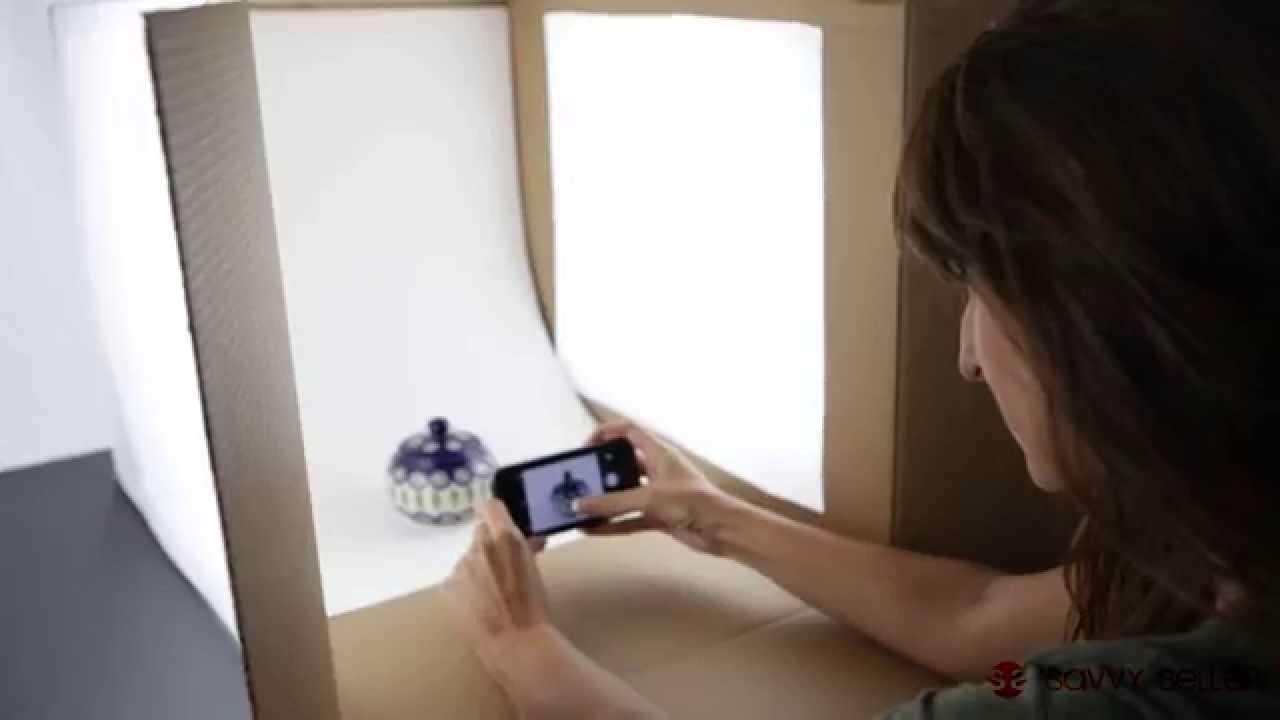
Choose Your Box:
Select a cardboard box that’s the right size for your products. You want it to be big enough to fit comfortably, but small enough to handle easily. 2.
Cut Out Sides:
Cut out three sides of the box, leaving the top and bottom intact. These will serve as windows for the lighting. 3.
Cover Holes:
Cover the holes with white tissue paper or thin fabric. Secure it using clear tape, ensuring a smooth and even surface. 4.
Create a Seamless Background:
Inside the box, place a sheet of white poster board, curving it up against the back of the box to form a seamless background. 5.
Set Up Lighting:
Position your desk lamps or LED lights on both sides of the box, aimed towards the tissue paper-covered windows. This will create soft, diffused lighting. 6.
Place Your Product:
Put your product inside the light box, ensuring it’s well-lit from both sides.
That’s It!
You now have a functional photo light box that’s perfect for product photography. You can adjust the size, shape, and interior setup to fit your specific needs. Experiment with different colored poster boards or add additional lights for more creative possibilities.
The Benefits of Using a Light Box:
By using a light box, you’ll:
Improve the quality of your product photos by providing even lighting
Reduce glare and shadows
Create a seamless background that enhances your products’ details
Enhance the overall visual appeal of your product photography
Tips and Variations:
Use different colored poster boards to create unique backgrounds for your products.
Add additional lights or adjust the position of existing lights to achieve the desired effect.
Experiment with different box sizes and shapes to fit your specific needs.
Conclusion:
Building a photo light box for under $10 is an easy and affordable way to elevate your product photography skills. With this simple guide, you can create professional-grade lighting setups that will make your products shine. Don’t wait – start building your photo light box today and take your product photography game to the next level!


There are no reviews yet.